
The Golden Fleece of hackers is to develop a zero-day exploit, an exploit that has not been seen by antivirus (AV) software or and intrusion detection system (IDS). A zero-day exploit is capable of skating right past these defenses as they do not contain a signature or another way of detecting them.
Developing a zero-day can be tedious and time-consuming and is not for the novice. It usually involves finding a buffer that can be overflowed, then writing the code that overflows the buffer, and taking control of the execution so that your malicious software is run. Not a simple task.
An alternative, of course, is to capture a zero-day exploit. Criminal hackers and national governments are always developing new zero-day exploits in order steal credit card numbers, confidential information, or national secrets. If we can convince those entities that our system is both important and vulnerable, they will likely attack it as well. When they do, we may be able to capture their exploit and reuse it. Some of these exploits are worth millions of dollars.
In the first part of this series, we downloaded and set up the Dionaea honeypot. What makes Dionaea different than other honeypots is its ability to capture exploits. We had set up the honeypot in the last guide, but we had yet to configure it. In this tutorial, we will configure Dionaea to prepare it for capturing exploits. I began this series setting up Dionaea on an Ubuntu 14.04 desktop system, so we will continue to use Dionaea on Ubuntu—but Dionaea will run on many Linux distributions.
Step 1: Open the Dionaea Configuration File
The first step is to open the Dionaea configuration file. First navigate to the/etc/dionaea directory.
ubuntu > cd /etc/dionaea
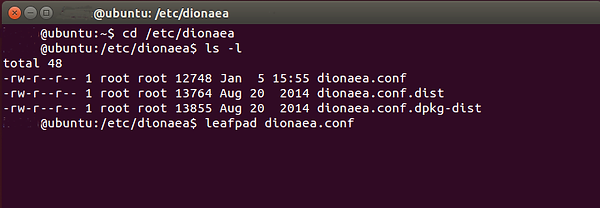
When you do a long listing on that directory, you can see the dionaea.conf file. Let's open that file with a text editor. On Ubuntu, we have several choices. In this case, I used Leafpad, but gedit, Vim, or any other text editor will work.
ubuntu > leafpad dionaea.conf
Step 2: Configure Logging
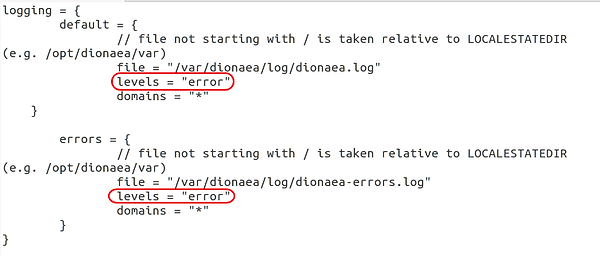
In its default configuration, Dionaea will create shiploads of logs in a production environment. In some cases, you will see multiple gigabytes per day of log files. To prevent that, we need to configure logging to only log "error" priorities and above level. (For more information on Linux logging, see my Linux Basics article on the topic or my new book "Linux Basics for Hackers" available on Amazon).
To do so, we need to navigate down to the logging section of the configuration file. There you will see a section that looks like this:

Note the two areas I have circled. Change both of them from "warning,error" to just "error".
Step 3: Interface and IP Section
Next, navigate down to the listen and interface section of the configuration file. We want the interface to be set to "manual" and the IP addresses set to any. This will allow Dionaea to capture on the interface of your choice (eth0) no matter what IP address is assigned to it.
If you want Dionaea to only listen on a single IP address, you can place that IP address in the line below, replacing the "::" part.
addrs = {eth0 = "::"}
As you know, "::" is IPv6 shorthand for any IP address.
Step 4: Modules
Next, we need to tell Dionaea what modules we want it to run.
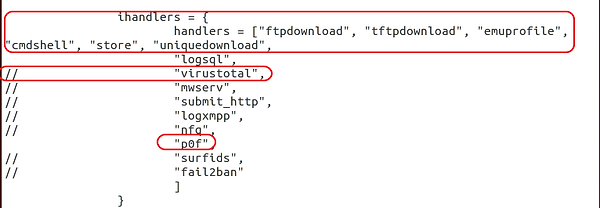
Leave the default setting here, but note that we have "virustotal" commented out. If the comments are removed, you can configure Dionaea to send any captured malware to VirusTotal. Let's keep it commented out.
Also note that we will be using one of our favorite tools, p0f, for the operating system fingerprinting. Lastly, we have "logsql" uncommented, enabling Dionaea to create and use an SQLite database. This will enhance our ability to manage the activity from our sensor by placing the data into a SQLite database.
Step 5: Services
Just below the modules, we have a section detailing the services we want to run. Note below that Dionaea by default is set up to run http, https, tftp, ftp, mirror, smb, epmap, sip, mssql, and mysql.

I recommend that you disable http and https as they are not likely to fool many attackers and may, in fact, identify it as a honeypot. Leave the others as they represent vulnerable services that may be attacked.
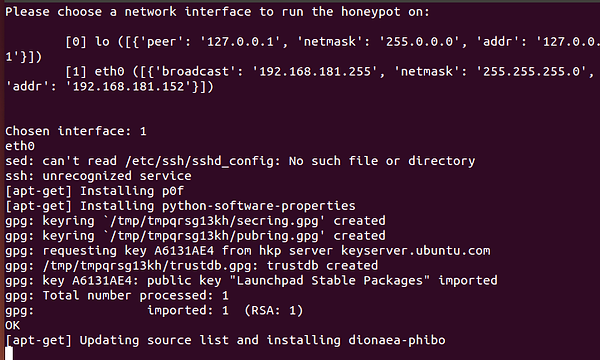
Step 6: Start Dionaea to Test
Finally, to test our new configuration we need to run Dionaea. We can do this by typing:
ubuntu> dionaea -u nobody -g nogroup -w /opt/dionaea -p /opt/dionaea/run/dionaea.pid
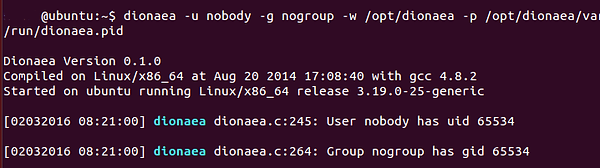
Now that Dionaea is running successfully, we can go to the next step, capturing and analyzing malware with Dionaea.