Welcome back, my hacker noviates!
In this series, we are building a Spy Pi using the tiny, but powerful Raspberry Pi. Our intention is build a device that can be used to watch and listen in any remote location. For the first 3 segments in this series, you can read them here.

In this fourth installment, we will be adding listening capability to our Spy Pi. To begin, you will need to add a sound card and microphone. Although you can buy very elaborate and sensitive microphones for the Pi--some costing hundreds of dollars--this tiny, inconspicuous USB combination sound card/microphone works well. It costs less than $6 and is available from many electronics retailers including Amazon. Probably its best feature is its cost and size.

Step #1 Install the Microphone
To install this combination microphone and sound card, simply plug it into the Spy Pi USB slot. It should be Plug and Play and the Raspbian operating system will automatically load its drivers.
Please note that I am logged into my remote Spy Pi via SSH, but you can take all the following steps via SSH or directly logged in to a terminal at the console.
To make certain that your Pi recognizes the new device, you can cat the /proc/asound/cards directory to see whether it has been recognized and loaded.
pi > cat /proc/asound/cards

As you can see, the Spy Pi recognizes the microphone and assigns it device 1.
Step #2 Use the AlsaMixer to Adjust the Volume
Next, we need to check on this device in Linux's AlsaMixer. ALSA is the Advanced Linux Sound Architecture. It's now the default sound framework in the Linux kernel. We can look at our new device in AlsaMixer by typing;
pi > alsamaixer -c1

In this case, we want Alsamixer to show us the controls for device 1 (-c1). Note hat the AlsaMixer on line 3 in the left of the control panel has three (3) Views, F3 Playback, F4 Capture, F5 All.
Since I'm connecting the the AlsaMixer via SSH, I can't use the function keys but I can select the view by using the Tab key.
Now, we want to Capture and Playback, so select F5 or All. I can do that by hitting the Tab key twice. We need to adjust the recording volume by using the UP and DOWN arrows on our keyboard.

Step #3 Recording from The Microphone
To be able to record from our new microphone, we will need the Sound Exchange (sox) application. We can get the package from the Raspberry Pi repository by typing;
pi > sudo apt-get install sox libsox-fmt-mp3

Now, to start recording and saving the recording for listening to later, we simply type;
pi > sox -t alsa plughw:1 listeningnow.wav

Where listeningnow.wav s the file we are saving the recording to.
To terminate the sox recording application, we hit Ctrl+C.
Now, to check to see whether our recording has been saved, we can simply do a long listing.
pi > ls -l

As you can see, we were able to record everything in a file named listeningnow.wav. To now listen to the contents of the file, we simply type;
pi > sox listeningnow.wav -d
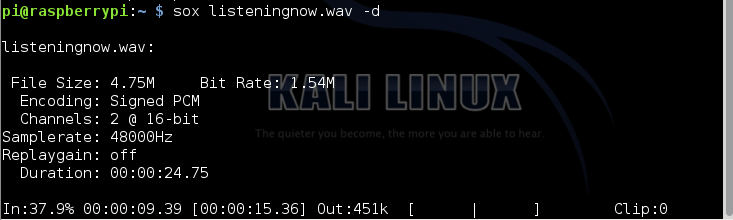
Great! Now we are not only able to record snapshots and video from our Spy Pi, but now we can record the sounds in the vicinity of the Spy Pi!
Now, we have a device that is tiny enough to be hidden just about anywhere and is capable of being a full fledged remote spying device!
In future tutorials, we will continue to enhance the capabilities of our Raspberry Spy Pi and test it out in different environments, so keep coming back.